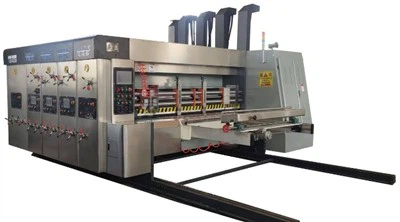
Model:1200x2800

Tech parameters
| Data/model | 900x2000 | 900x2400 | 1200x24000 | 1200x2800 | 1400x2400 | 1400x2800 | 1600x2800 | 1600x3200 | 1600x3600 |
| Max machine speed(pcs/min) | 300 | 300 | 250 | 220 | 220 | 200 | 200 | 180 | 120 |
| Max feeding size(mm) | 880x2000 | 880x2400 | 1180x2400 | 1180x2800 | 1380x2400 | 1380x2800 | 1570x2800 | 1570x3200 | 1570x3600 |
| Min feeding size(mm) | 280x660 | 280x660 | 320x680 | 320x680 | 360x680 | 360x680 | 420x710 | 420x710 | 420x710 |
| Skip feeding(mm) | 1100x2000 | 1100x2400 | 1500x2400 | 1500x2800 | 1700x2400 | 1700x2800 | 1900x2800 | 1900x3200 | 1900x3600 |
| Max printing area(mm) | 850x2000 | 850x2400 | 1150x2400 | 1150x2800 | 1350x2400 | 1350x2800 | 1540x2800 | 1540x3200 | 1540x3600 |
| Thickness of printing plate(mm) | 7.2 | 7.2 | 7.2 | 7.2 | 7.2 | 7.2 | 7.2 | 7.2 | 7.2 |
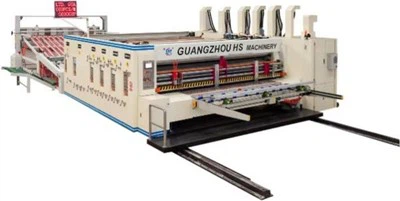
Slotting Department Operation Instructions
1. Before adjusting the slotting phase, please adjust the slotting blade gap to at least 2.5 mm to avoid damage caused by excessive pressure on the corner cutting blade and the lower blade. After the operation is completed, adjust the gap back to the original position.
2. The initial gap of the pre-pressure roller is 1/2 the thickness of the cardboard, and the initial gap of the creasing roller is 1/4 the thickness of the cardboard. Adjust these according to actual production needs or different cardboard materials.
3. Adjust the slotting blade gap to 2.5mm-2.2mm. For the corner cutting blade, apply 0.3mm of pressure after the blade touches the lower blade.
Replace or re-sharpen the blades if they become dull or curled. If the blades are after mold repair,
adjust the set screws on the blades; do not arbitrarily solve the problem by increasing pressure.
4. During each order change, take advantage of the downtime while washing the machine to clean the dust and paper scraps from the cutter shaft, lead screw, and linear guide rails with an air gun.
5. After each disassembly, reinstall the cutter in its original marked position; otherwise, the cutter position will be inaccurate.
6. Perform a home point calibration on the cutter positions (front and rear cutters, left and right cutters) weekly to prevent inaccurate order scheduling due to accumulated errors.
7. If the grooving section is not used for a long period or if grooving is used but trimming is not, clean and move the cutter head daily, and perform lubrication and rust prevention treatment using WD40.
Position adjustment before and after slotting
(Phase adjustment) (Electric adjustment)
1. After zeroing the adjustment, adjust the slotting position (phase) according to the leading edge slotting depth of the cardboard.
2. Switch to the "Automatic" position for setting adjustments and to the "Manual" position for inching adjustments.
1. To return the grooving blade to its original setting position, please refer to the "Zeroing Adjustment" function in the paper feed unit.
2. When performing inching adjustments, select either "Forward" or "Backward" according to the adjustment requirements using the button switch.
Hot Tags: paper box printing machine, China paper box printing machine manufacturers, suppliers, factory