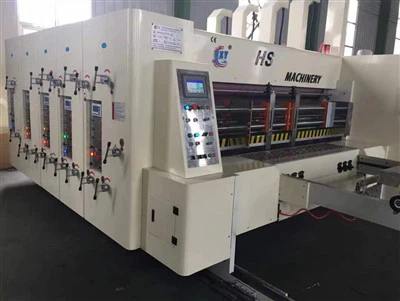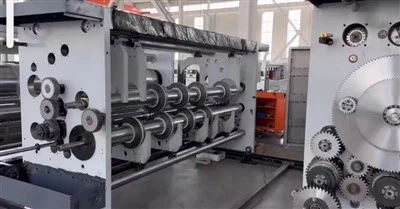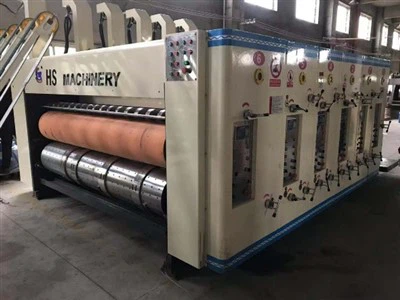


Model:1200x2800

Tech parameters
| Data/model | 900x2000 | 900x2400 | 1200x24000 | 1200x2800 | 1400x2400 | 1400x2800 | 1600x2800 | 1600x3200 | 1600x3600 |
| Max machine speed(pcs/min) | 300 | 300 | 250 | 220 | 220 | 200 | 200 | 180 | 120 |
| Max feeding size(mm) | 880x2000 | 880x2400 | 1180x2400 | 1180x2800 | 1380x2400 | 1380x2800 | 1570x2800 | 1570x3200 | 1570x3600 |
| Min feeding size(mm) | 280x660 | 280x660 | 320x680 | 320x680 | 360x680 | 360x680 | 420x710 | 420x710 | 420x710 |
| Skip feeding(mm) | 1100x2000 | 1100x2400 | 1500x2400 | 1500x2800 | 1700x2400 | 1700x2800 | 1900x2800 | 1900x3200 | 1900x3600 |
| Max printing area(mm) | 850x2000 | 850x2400 | 1150x2400 | 1150x2800 | 1350x2400 | 1350x2800 | 1540x2800 | 1540x3200 | 1540x3600 |
| Thickness of printing plate(mm) | 7.2 | 7.2 | 7.2 | 7.2 | 7.2 | 7.2 | 7.2 | 7.2 | 7.2 |
Printing Department Work Instructions
1. Although it is an adsorption printing press, if the color is not involved in printing and the cardboard bends too much, auxiliary paper-pressing sponge strips must be installed to prevent the cardboard from shifting or tilting during travel.
2. If it is not an automatic order scheduling machine, and the color group is not involved in printing, the downward pressure gap must be adjusted to match that of the color group being printed. Otherwise, the suction box table will not be on the same horizontal level, causing misregistration.
3. When using the foot switch, the color group must be separated from the preceding and following color groups. Otherwise, it will use a small phase, and the plate wiping and zeroing may be inaccurate.
4. When hanging the plate, please check whether the printing plate cylinder is in the centered position and whether the limit photoelectric sensor is working properly.
5. When inking the rubber roller, the rubber/screen roller must be in the clamped state, the idle speed motor must be turned on, the ink pump handle must be pulled out, the ink supply state must be selected, and the confirmation key must be pressed. When inking the doctor blade, the doctor blade must be rotated to the closed state with the screen roller, and the empty oil tank must be checked to ensure there is sufficient hydraulic oil.
6. When replacing the doctor blade, it is best to remove the lower doctor blade clamp and clean any ink clumps or other dirt from the clamp plate. During installation, tighten the screws from the middle outwards. After installation, add water first and then position the doctor blade at its origin. This is done by selecting "Manual" mode on the touchscreen, separating the front and rear of the unit, and continuously pressing "Ink Volume +" until the lower limit photoelectric sensor indicator light illuminates. After each wash, the doctor blade chamber needs to be rotated and wiped with a soft cloth to remove any dried ink flakes and residues or mixtures from the blade chamber.
7. The air intake damper should open according to the width of the cardboard, and its size should be smaller than the length of the cardboard to prevent air leakage.
8. After each order is completed, use a high-pressure tap water gun to rinse the ink tank rack, filter screen, etc., to keep the equipment clean.
Hot Tags: flexo printing corrugated, China flexo printing corrugated manufacturers, suppliers, factory, Flexo Printing Corrugated Box, Carton Flexo Printing Machine, Flexo Die Cutting Machine, Inkjet Carton Printer, paper box making machine, carton printing machinery